Set Up Facebook Comments
Apr 26th, 2011This is a step-by-step beginner tutorial showing how to include Facebook comments to your own website.
It is now possible to directly add the Facebook comments system as a plugin in your website. Without talking more, I am going to show you right away how easy it is to configure and then I will share with you some thoughts about it.
Step 1: Create a Facebook application
The Facebook comments plugin is considered as a Facebook application. So it needs application credentials to communicate with Facebook servers. You need an app ID for your plugin.

To get it, go to facebook.com/developers (I assume you already have a Facebook account) and click on “Set Up New App”. Then follow the wizard and you there you have:
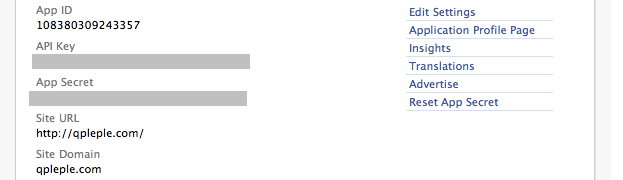
Important: make sure you filled “Site URL” and “Site Domain” with your infos.
Step 2: Add the meta tags
In the <head> tag of your page, add these 2 lines (those are mine that
you can this in the source code of this page):
<meta property="fb:app_id" content="108380309243357">
<meta property="fb:admins" content="1536397056"/>
and replace my app ID by yours and my Facebook account ID by yours (How to get your Facebook ID). The second line determine who will be able to manage the plugin (you!).
Step 3: Add the comments plugin
Now that you have set up everything, here is the code you have to paste where you want the plugin to show:
<div id="fb-root"></div>
<script src="http://connect.facebook.net/en_US/all.js#appId=108380309243357&xfbml=1"></script>
<fb:comments href="http://www.example.com/post/12" num_posts="2" width="750"></fb:comments>
Just edit the last line before deploying:
-
the
hrefparameter have the URL of the page in which the plugin is display (if you have several pages, fill it dynamically according to the page you return). -
the
num_postsparameter sets the number of posts displayed (the others will be accessible by clicking on “…”) -
and set the
widthparameter according to space you have to put the plugin
And that’s it ! You can manage your plugin and moderate the comments at developers.facebook.com/tools/comments. Keep in mind that what you see in not actually on your site. It is a piece of Facebook website, seen through some kind of window (an iframe) on your site. It is all client-side, nothing go through you server.
Now, is it good or not?
It has many advantages:
-
The comments are nominatives, so less spam and you can expect a higher quality in conversations.
-
It is super easy to set up, compared to develop a homemade comments system.
-
A built-in integration to Facebook: by default, the checkbox “Post on Facebook” is checked. So every comment, by default, will be showed in the users Facebook feeds.
-
It shows your friends comments firsts: users will immediately see the comments of their friends at the top of the comment list.
But also a few drawbacks:
-
The comments are managed by Facebook and there is no proper way to backup them. If one day Facebook choose to remove them or accidentally loses them, everything is lost.
-
Not anyone has a Facebook account.
Eventually, it is good enough to make some very big blogs such as TechCrunch switch from their homemade system to the Facebook one. It’s up to you !