Reverse-engineering Of Google Home Animations
Jun 14th, 2011Discover what is the technology behing animations on Google homepage.
I am sure you’ve noticed that sometimes you can see animations for special events instead of the logo of Google on its homepage such as this one:
This animation is not a movie and it not made with flash. It is pure javascript. And one thing great with javascript is that it is a client-side code, so you can read it. When you browse the web and you see something cool, you can just open the cover and see how it is made. Let’s do it for this animation.
Code compression
But, for speed reasons, the javascript is compressed to make the code shorter and faster to download :
-
all the variables and functions are renamed with letters to make it shorter,
-
all the white spaces and end of lines are trimmed,
-
and some tricks such as
a == 1 && doThing()instead ofif (a == 1) { doThing() }
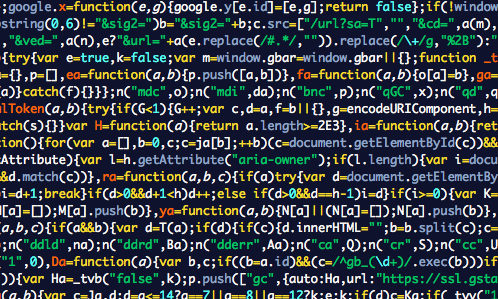
And the result of that process is that it looks like a Christmas Tree :

This code is not made to be human-readable, but fast to be downloaded.
Images sprites
So how can you make that kind of animation in Javascript? The trick used by Google is a loop that add a new image every 86ms (I don’t know why 86). But this is not the whole image that is repainted at each iteration, it is only the part that has changed. So Google made 155 different images that the script displays one by one. But it would be too slow to make 155 requests to load all the images. So Google used only one big image with all the small images:
And for each iteration of the loop, it says:
Put this part of the big image here on the screen
I unpacked the code and cleaned it to keep only what is essential the make the animation run. I renamed the variables and functions with meaningful names so you can read and understand the code pretty easily.
var data = [[307, 48, 88, 89], ...]; // 155 elements in the array data

var logo = document.getElementById("logoGoogle");
var tileNumber = 0;
var offSetX = 0;
var offSetY = 0;
var maxHeigth = 0;

var displayNext = function() {
    var left = data[tileNumber][0];
    var top = data[tileNumber][1];
    var width = data[tileNumber][2];
    var height = data[tileNumber][3];
    var newLine = data[tileNumber][4];

    // Creates and position the new tile
    var tile = document.createElement("div");
    tile.id = "logo" + tileNumber;
    tile.style.left = left + "px";
    tile.style.top = top + "px";
    tile.style.width = width + "px";
    tile.style.height = height + "px";
    tile.style.background = "url(/img/post-reverse-engineering-of-google-homepage-animation/sprite.png) no-repeat " + -offSetX + "px " + -offSetY + "px";
    //tile.style.border = "1px solid #DDD";
    logo.appendChild(tile);

    // Computes the offsets for the next tile
    maxHeigth < height && (maxHeigth = height);
    newLine ? (offSetX = 0, offSetY += maxHeigth, maxHeigth = 0) : offSetX += width;

    // Call this function again if it is not the last tile
    tileNumber++;
    tileNumber < data.length && window.setTimeout(displayNext, 83);
};

var image = document.createElement("img");
image.addEventListener("load", window.setTimeout(displayNext, 3000));
image.src = "/img/post-reverse-engineering-of-google-homepage-animation/sprite.png"
Comments on the code
First, you have an array with all the coordinates of the small images
(which part of the big image goes where). All the elements of the array
is an 4-element array [x, y, width, height] except for the ends of
line of the big image that have a 1 as 5th element
([x, y, width, height, 1]) To wait the big image to be loaded before
starting the animation, there is this trick:
-
the area of the animation has as background the first image of the animation (separate from the big image).
-
the script creates an
imgtag with source the big image whithout adding it to the document. So the browser will download the big image but not dispay it. -
the scripts add the event
When this
imgis ready, launch the loop